Are you thinking about moving from Outlook to Apple Mail on Mac? And searching for a way out to import OLM folders in Apple Mail on Mac Ventura? If yes, then keep all your worries aside and read the following segment to implement the required task immediately. But, let’s first understand some common points due to which users wants to import OLM folders in Apple Mail.
Why to Import OLM Folders in Apple Mail on Mac Ventura?
OLM is a popular & default file format of Outlook for Mac email client. It possesses the important data items of users account such as emails, contacts, calendars, etc. However, it is only created on Mac OS. And, don’t confuse it with PST. Although these two file formats are Outlook-supported but they are compatible with their respective platforms. PST is created on Windows by Windows Outlook and it holds the same responsibility as OLM. But here, we are focusing on Microsoft Outlook for Mac email application. It is a commonly used by many IT firms and individuals to manage their personal day-to-day database. Also, it is very well-known as Personal Information Manager because it helps users in managing their personal contact details, calendars, appointments, meetings, etc.
Apple Mail, on the other hand is another personal information manager that manages the entire users database just like Outlook for Mac. The email platform is introduced by NeXT and included by Apple Inc. in macOS, watchOS, iOS, and iPadOS. It is a default email client of Mac OS and lots of people make use of it to send/receive emails globally. Like OLM, it makes use of MBOX file type to store the list of user’s emails and attachments. Moreover, it is preconfigured with most used webmail services such as Gmail, Yahoo Mail, AOL, iCloud, Outlook, and more. It is equipped with many amazing features that ease the stress of users to some extent.
Without a doubt, Outlook and Apple Mail are wonderful programs when it comes to email management. But, at times, due to arise of sudden official requirements, users need to perform the migration between them. Not only this, there are numerous people who keeps changing the email platforms to experience a distinct GUI. And, in-between this, they forget that each email client supports different file format. Due to this, one start searching for a solution that could help them move files of old email application into new one.
How to Import OLM Folders in Apple Mail on Mac Ventura?
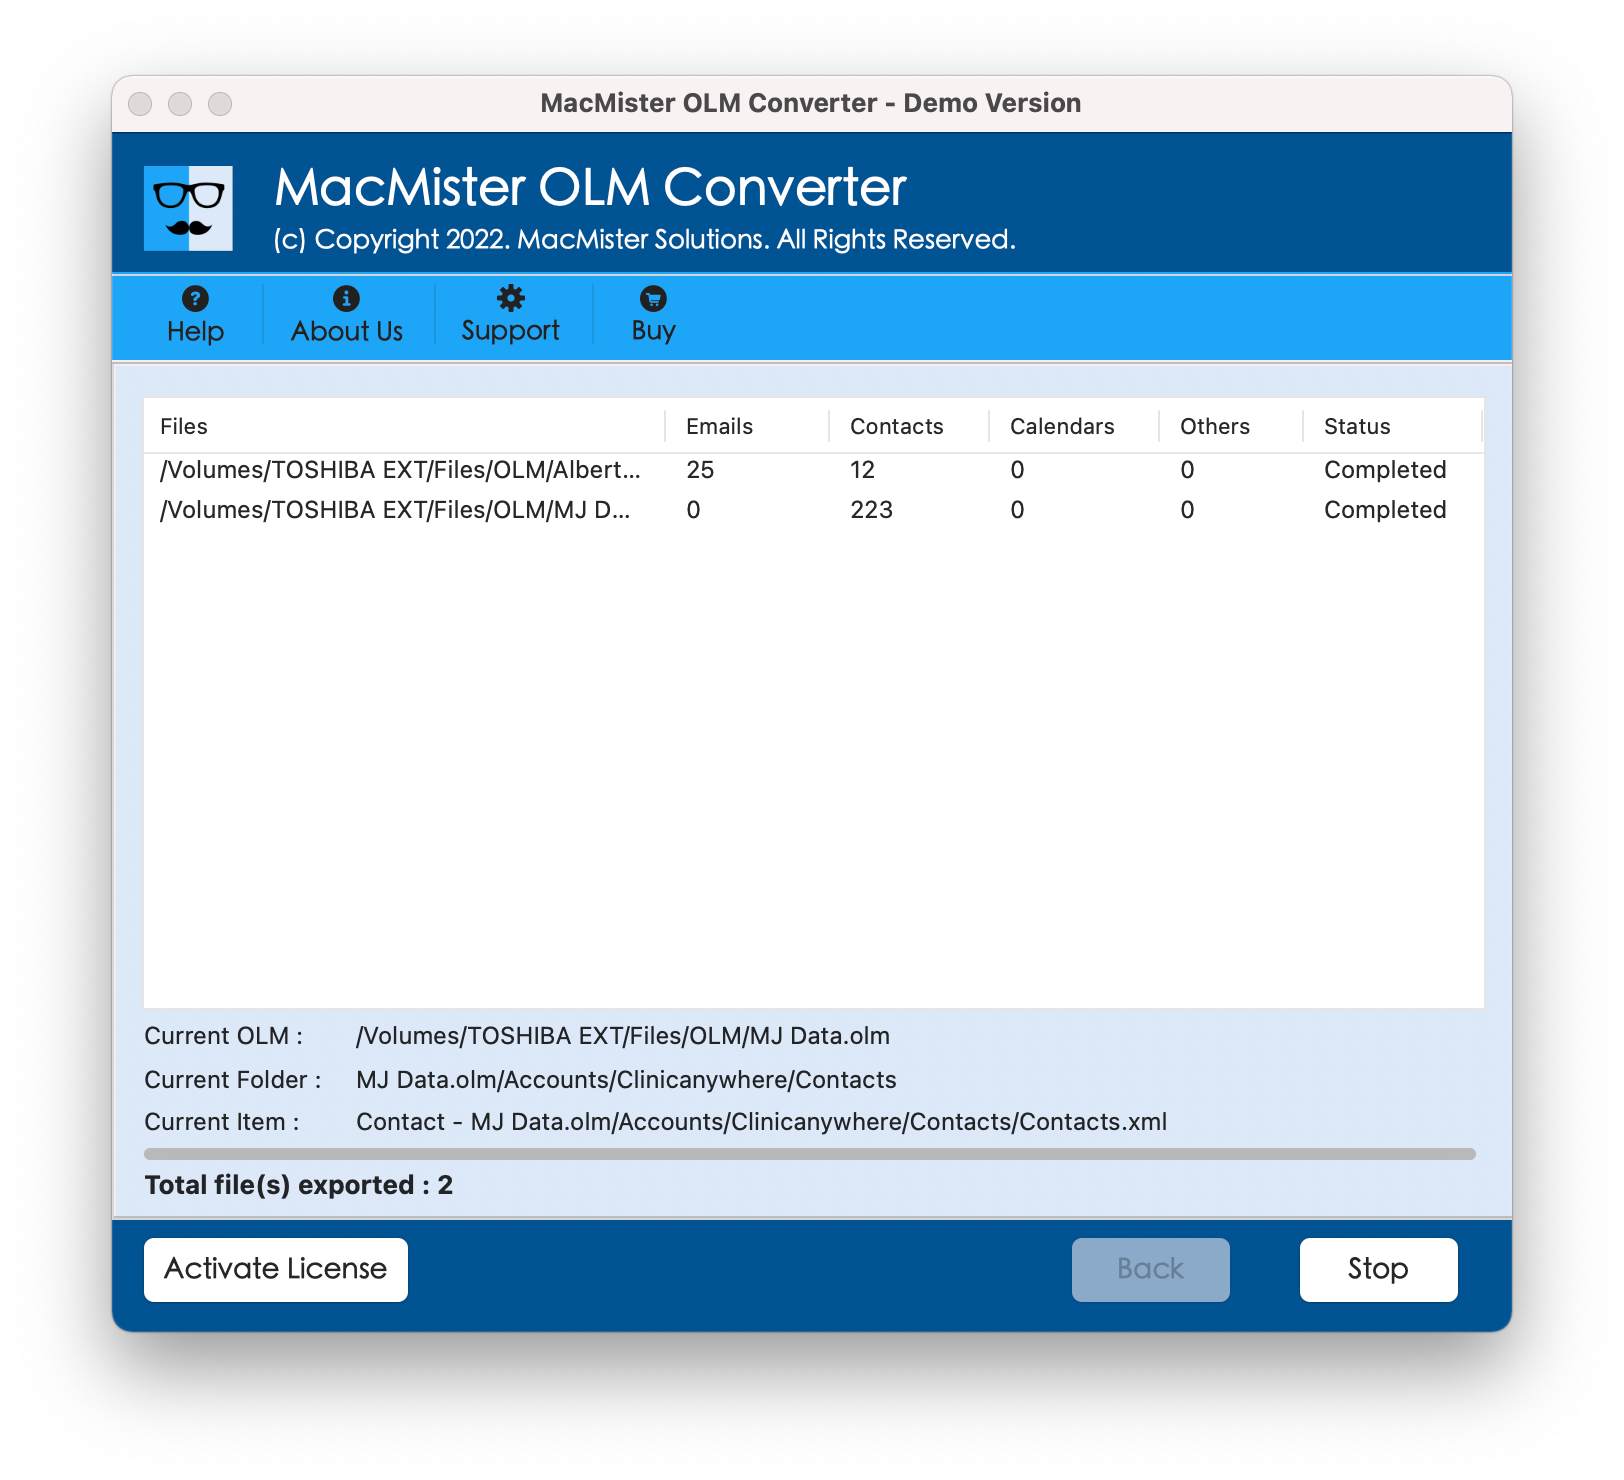
MacMister OLM to MBOX Converter is a perfect and suitable approach for every Mac user who wants to effortlessly batch import OLM folders in Apple Mail with mails & attachments. The software is has a friendly approach and built-up in a way that any professional and non-professional users can operate without facing any issues. Even, the procedural steps are not lengthy. By tapping three easy clicks, users will be able to successfully import OLM folders to MBOX with 100% accuracy.
Moreover, the application delivers many remarkable features with the help of which Mac users can import OLM folders in Apple Mail as per their requirements. However, the free demo is also available through which one can gain the practical experience of OLM to MBOX conversion for free.
Working Steps to Import OLM folders in Apple Mail on Mac Ventura
Step 1. Download, launch, and open OLM to MBOX Converter on macOS Ventura.
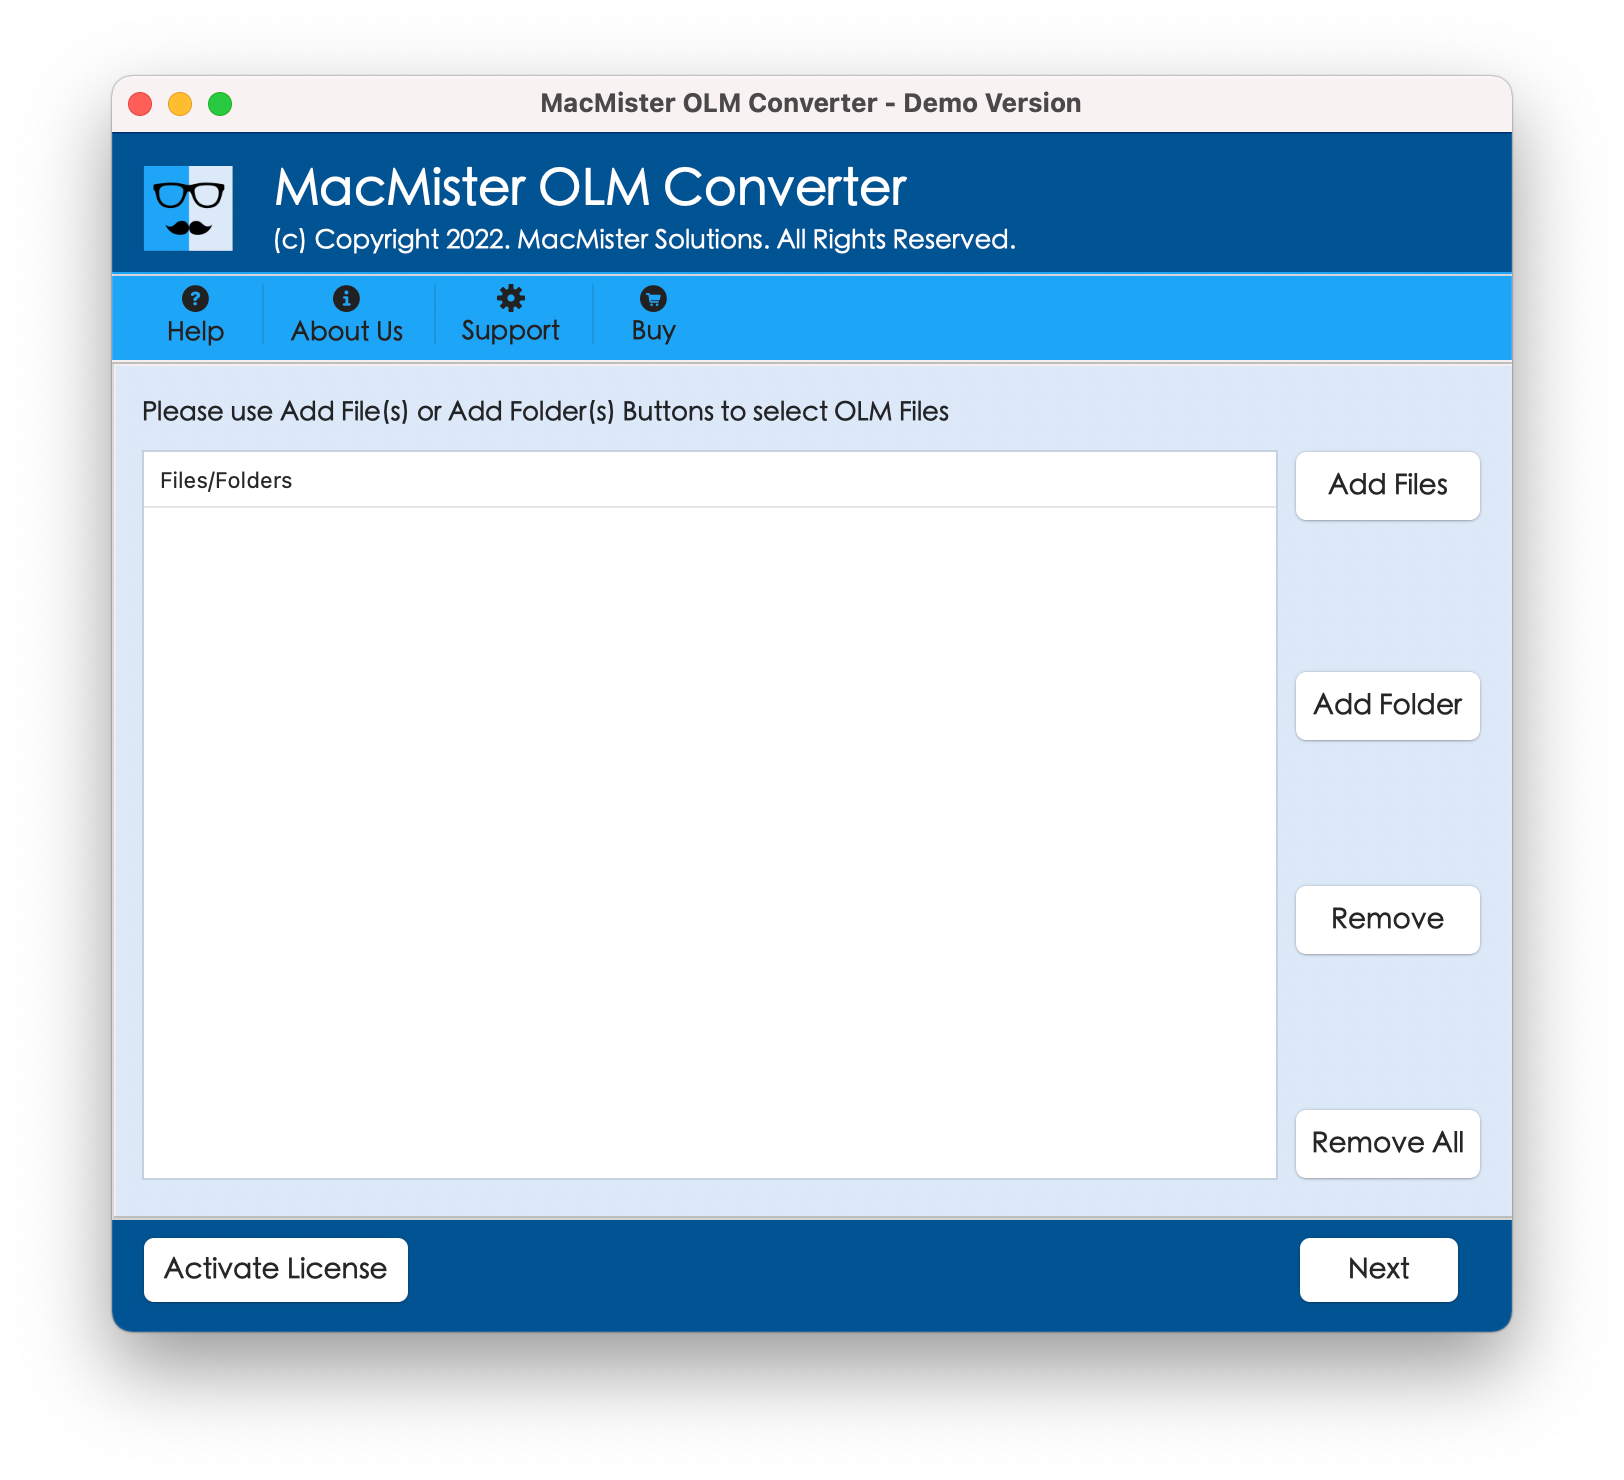
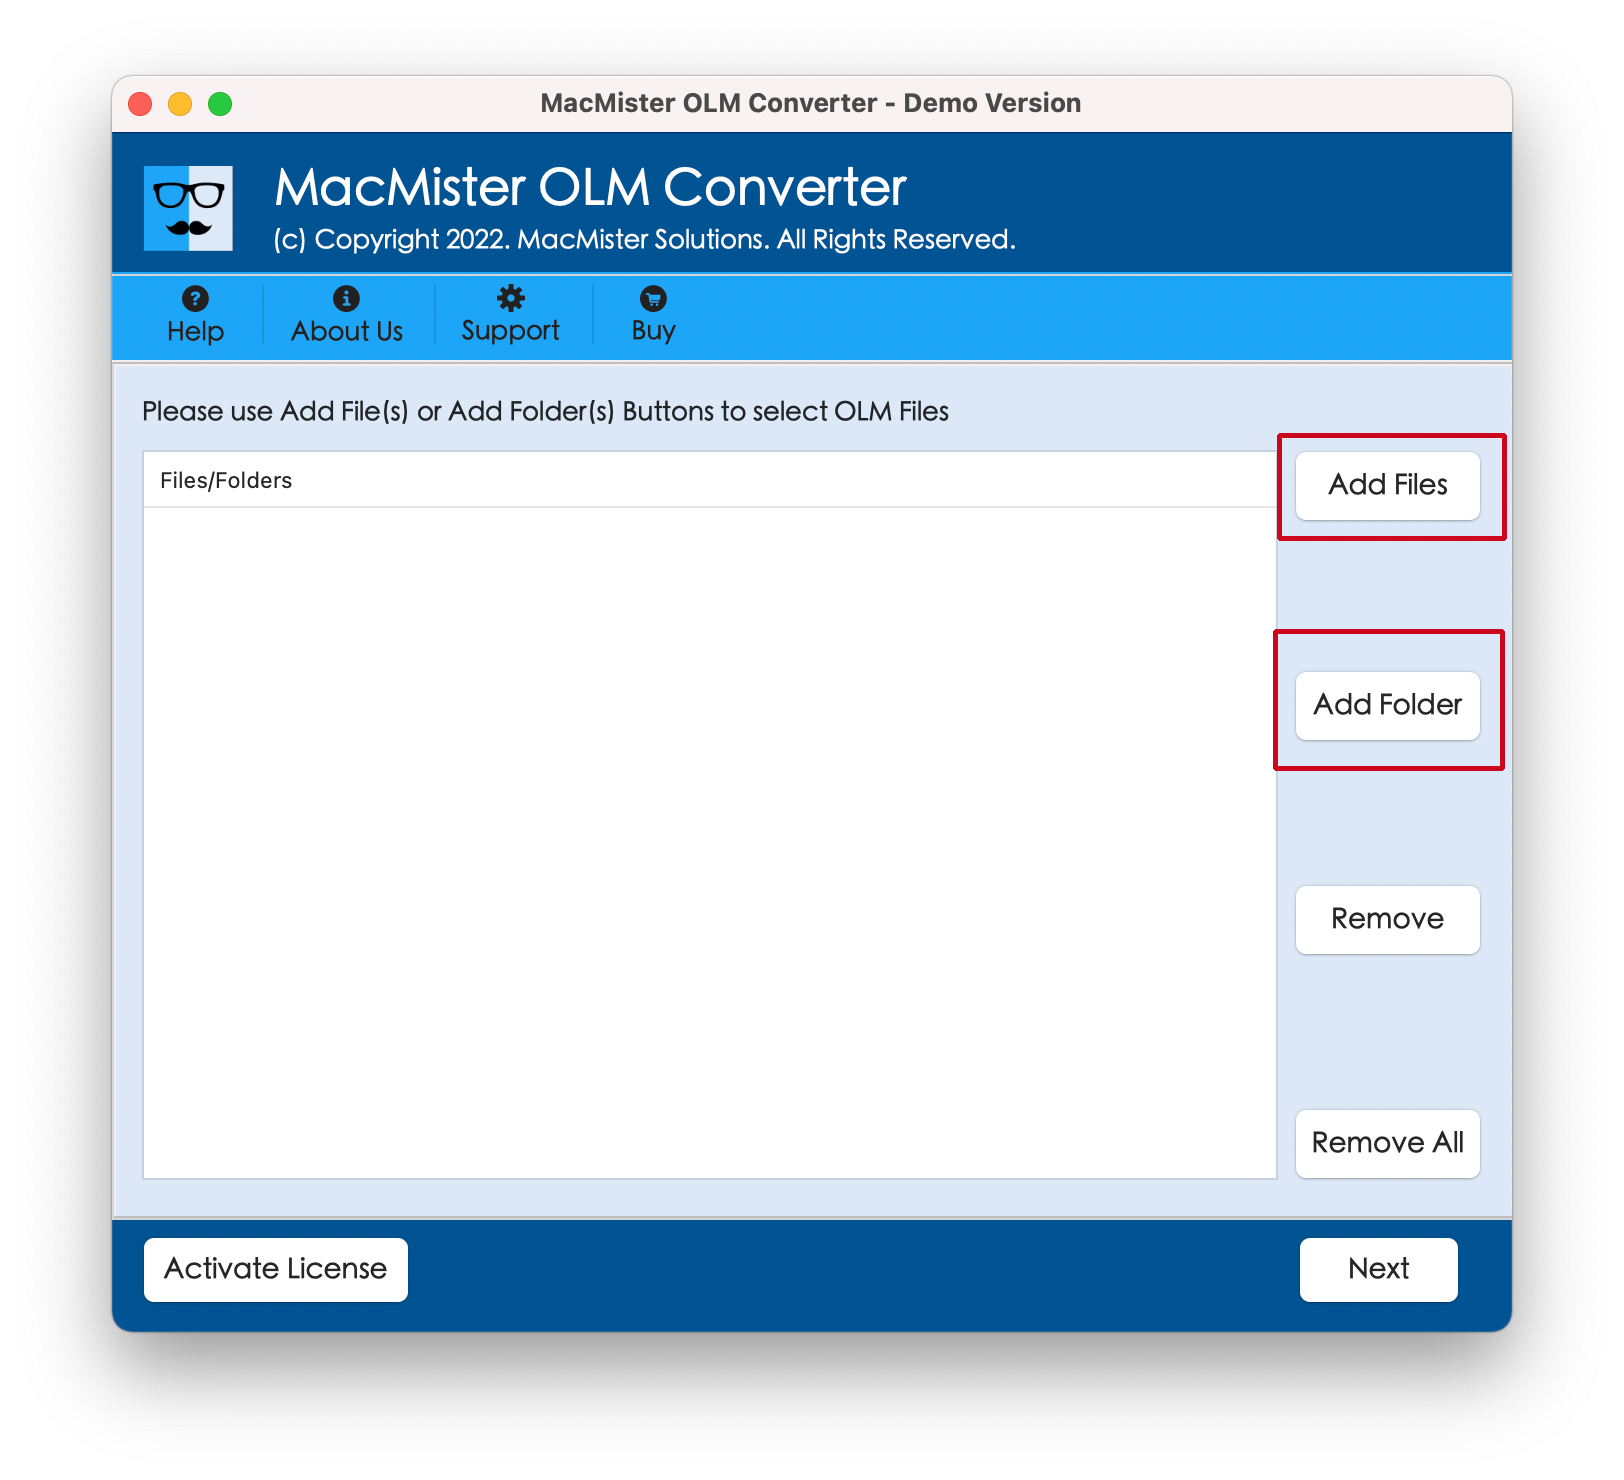
Step 2. Now, make use of Add File(s)/Add Folder buttons to add required OLM mailboxes on the software and click on Next.
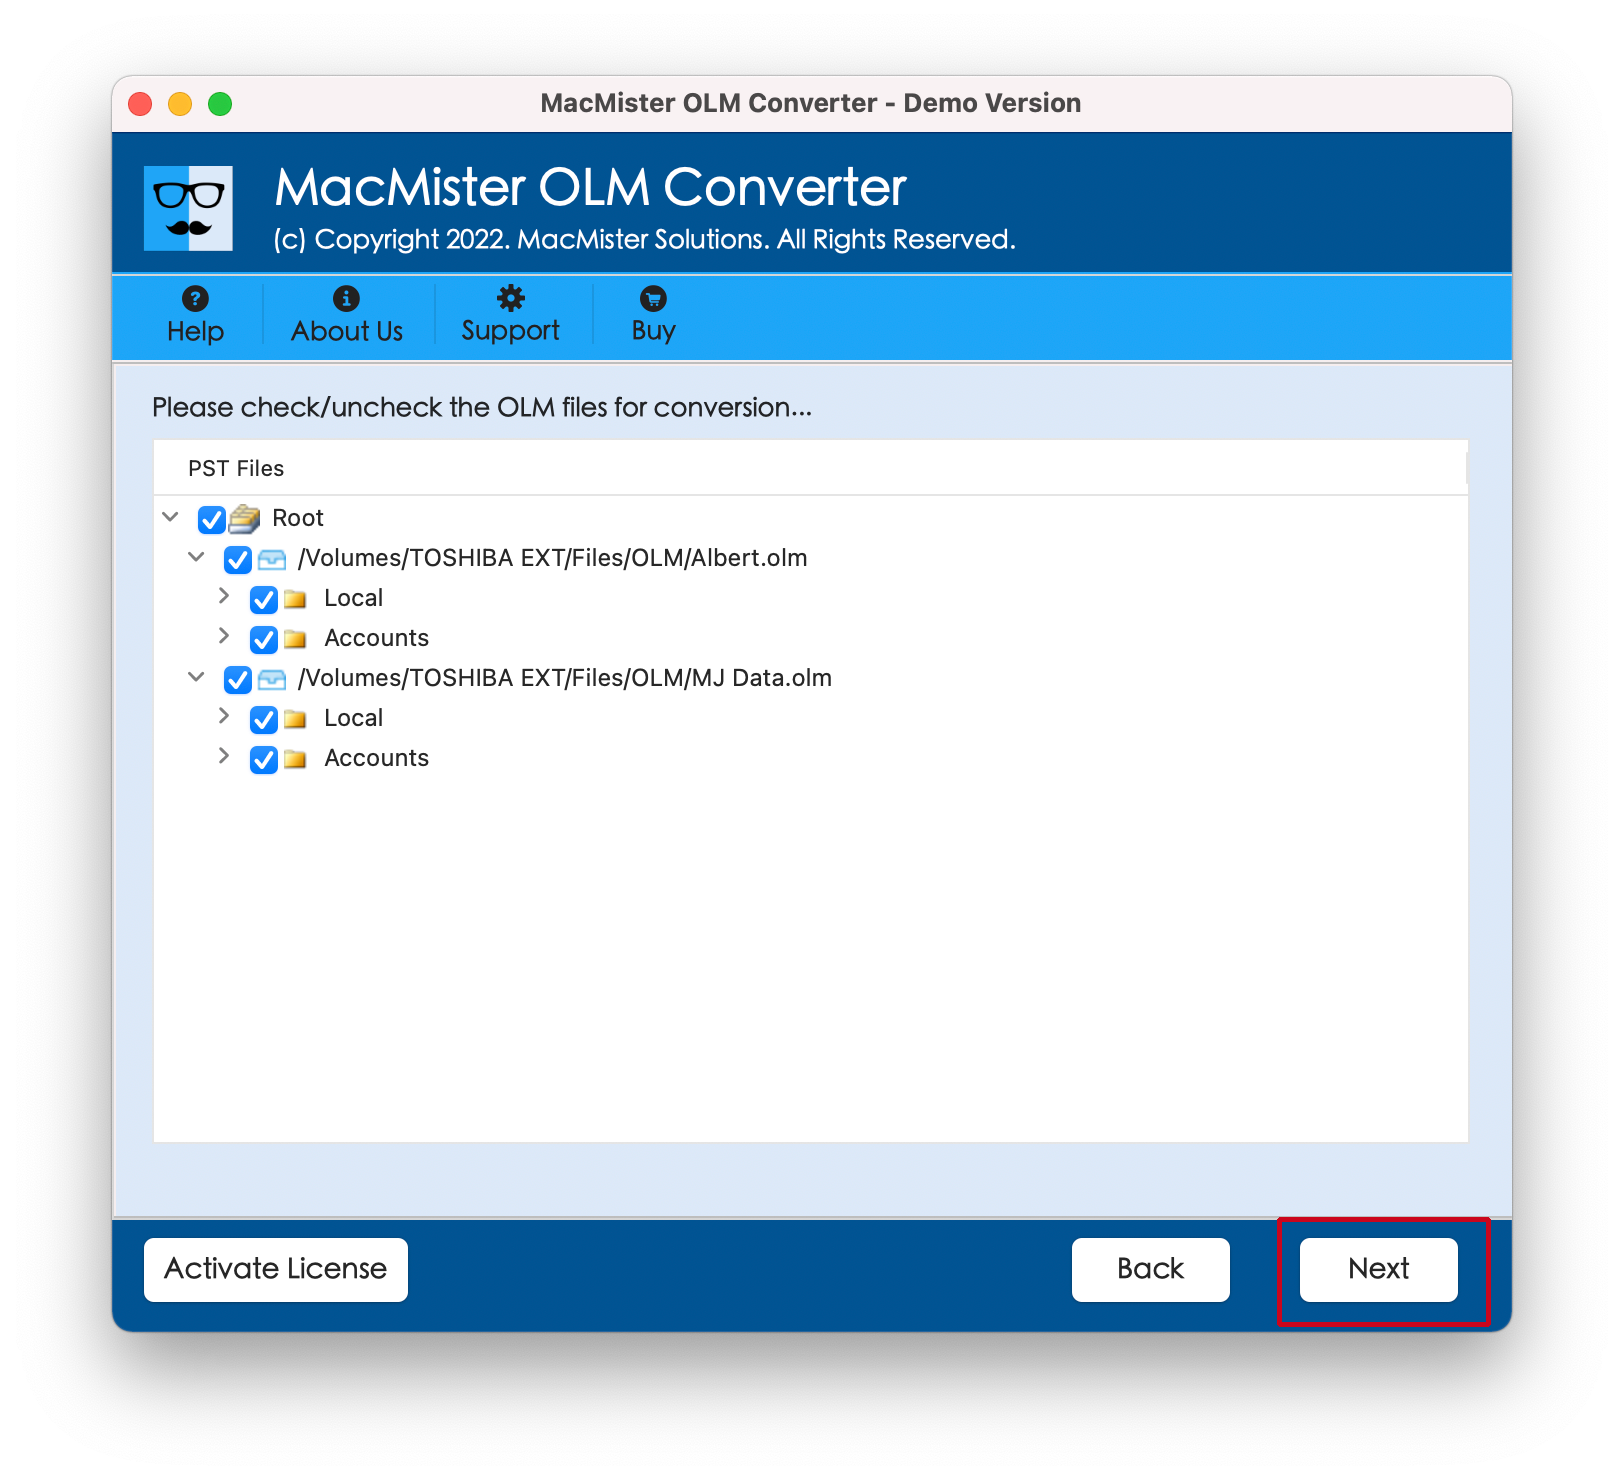
Step 3. The selected OLM files will start listing on the software panel with checkboxes. Quick Note. The checkboxes are useful to import selective OLM folders in Apple Mail. Click Next.
Step 4. Click Select Saving Options and choose MBOX file format from the list.
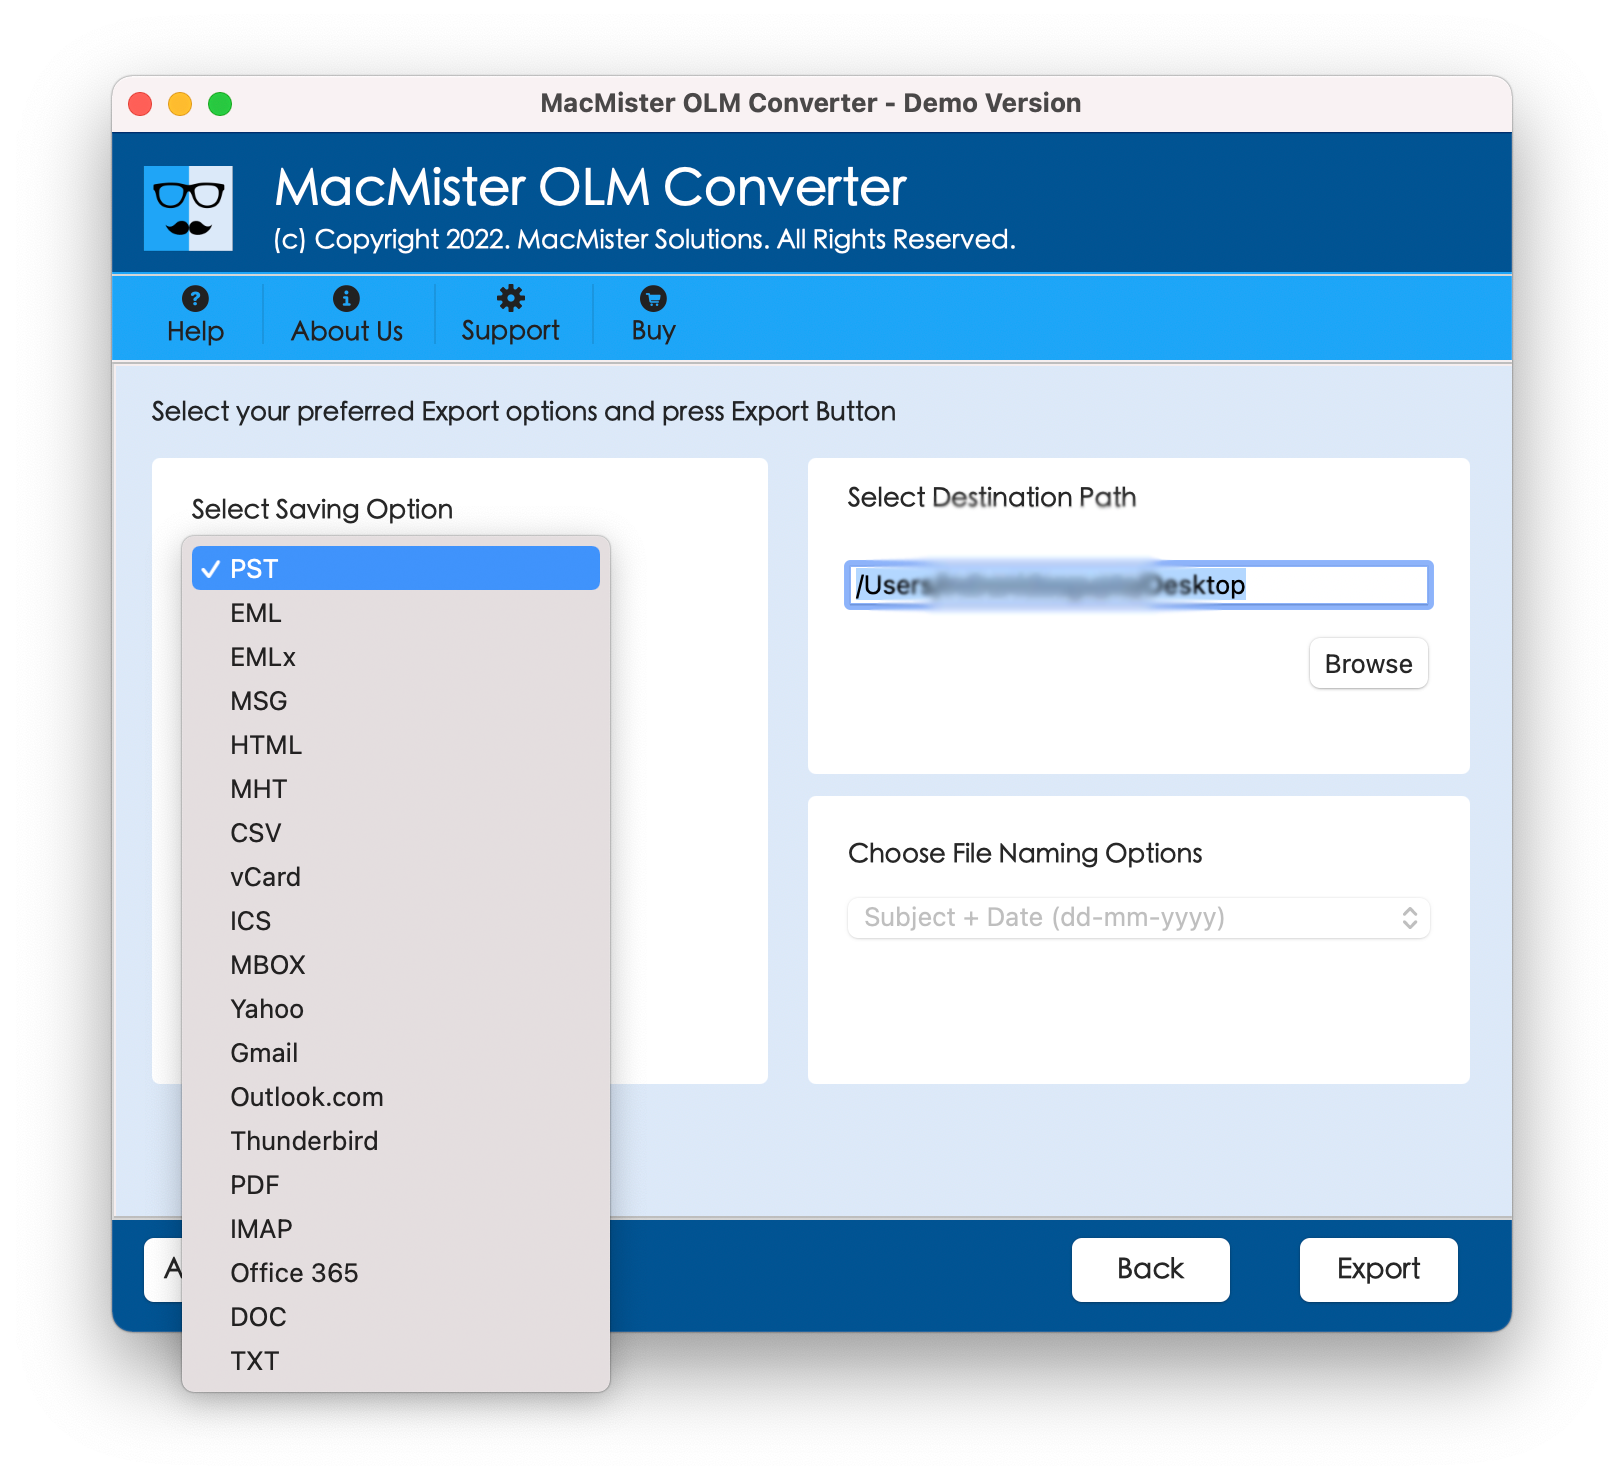
Step 5. Set the sub-options of MBOX according to your specific needs and then click on Export button to start the process of OLM to MBOX.
Step 6. The process is now live and the app will display the ongoing export status of OLM folders to MBOX conversion on Live Conversion window.
The whole task will end within seconds and show the confirmation by displaying “Conversion Completed” message. Now, you can click on OK and proceed further by opening Apple Mail email client on the system.
Working Steps to Import Resultant MBOX Folders in Apple Mail
- Open Apple Mail on macOS Ventura.
- Click File. Select Import Mailboxes. Choose Files in MBOX Format. Hit Continue.
- Locate resultant MBOX files. Click the same and press Choose
- Import process will take place and after it finishes, click Done.
- Now, Apple Mail main account screen will open. You will see new Import folder created on the left navigation pane under On My Mac. Double-click on the same and the items will appear. Click on the same to view the list of files.
However, you can now easily read the data of resultant files in Apple Mail environment. The entire details will be accurate and appear without modification.
Conclusion
The write-up here mentioned the advanced process to import OLM folders in Apple Mail on macOS Ventura. The MacMister OLM Converter for Mac is verified and highly demanding. Many Mac users are utilizing it to perform the conversion of OLM files on macOS. Moreover, the app not only supports MBOX format but also allows to import OLM files into 15+ other saving options like PDF, MSG, EML, EMLx, MHT, HTML, DOC, CSV, IMAP, Gmail, G Suite, Office 365, and more. However, the freeware version is also present with the help of which you can check the procedure to import OLM folders in Apple Mail on Mac Ventura for free. It enables import 25 emails and attachments from OLM to MBOX free of cost.